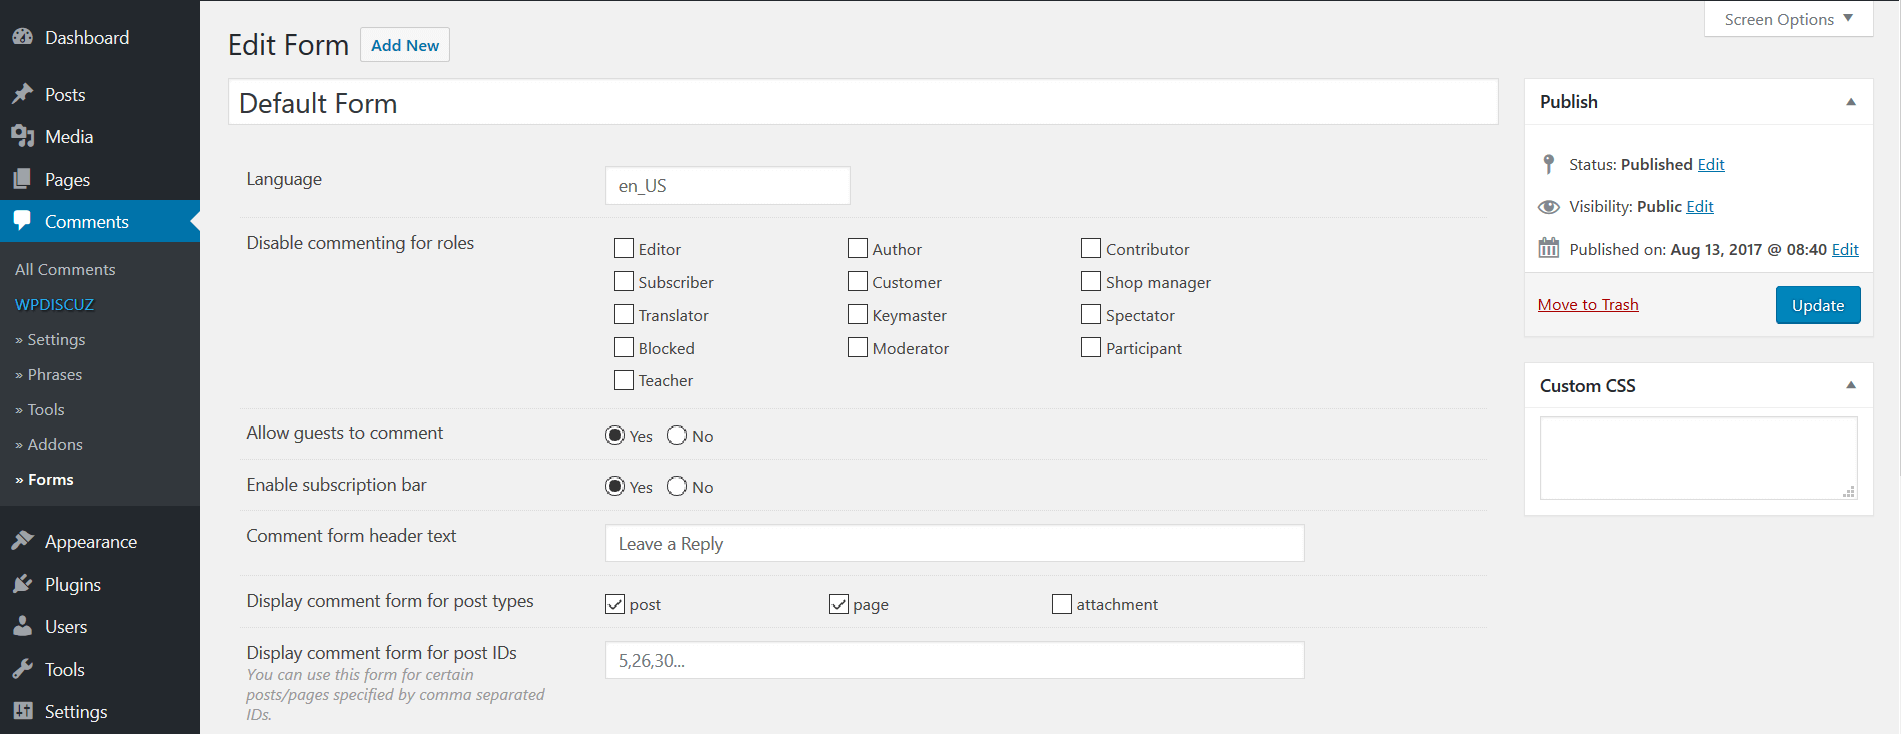
wpDiscuz comment forms can be found and managed in Dashboard > Comments > Forms admin page. By default there is one comment form with “Default Form” title. Comment form editing screen consists of the Comment Form Settings area (above) and Comment Form Builder section (below). In this documentation we’ll go through all tools of comment form builder. The “Comment Form Settings” is described in the previous article.
Comment Form Layout
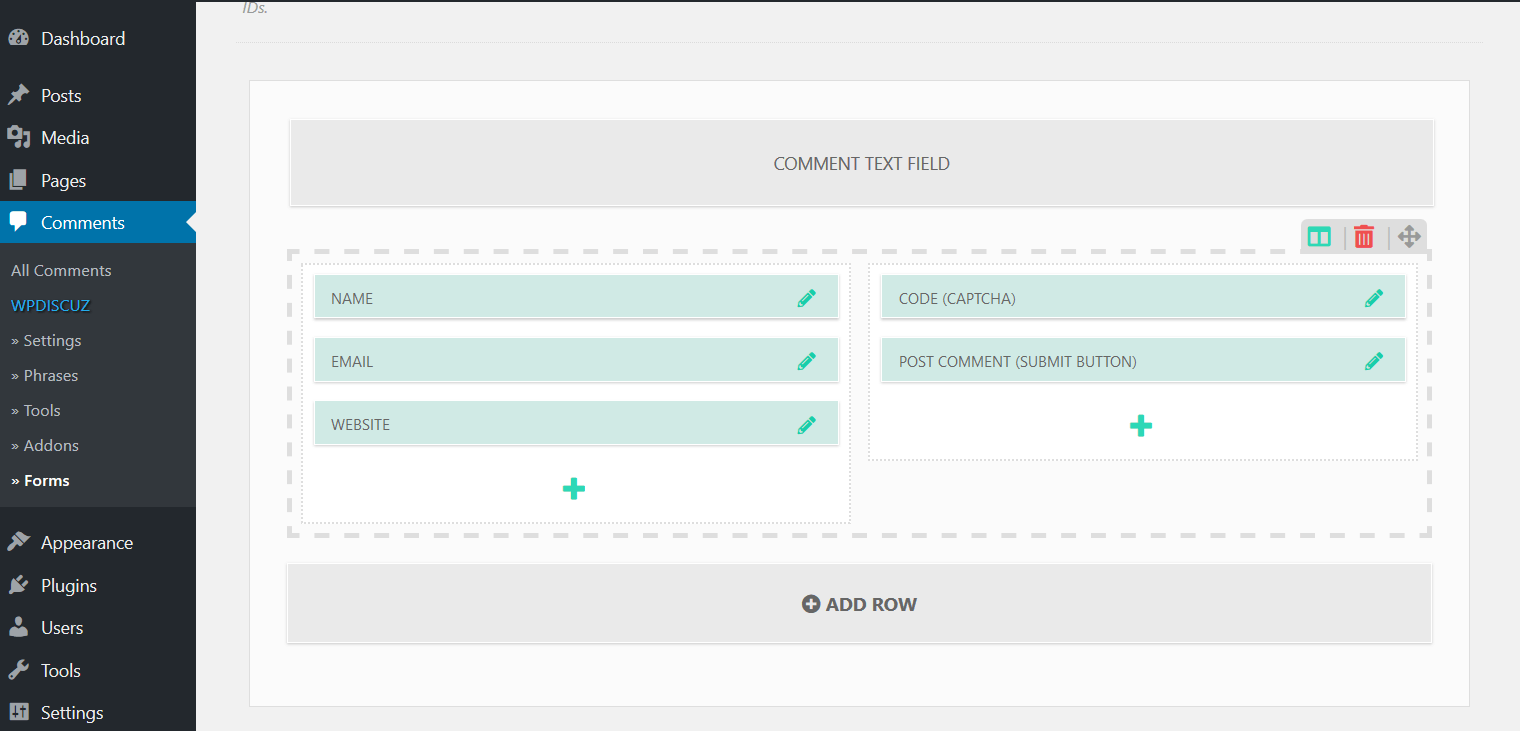
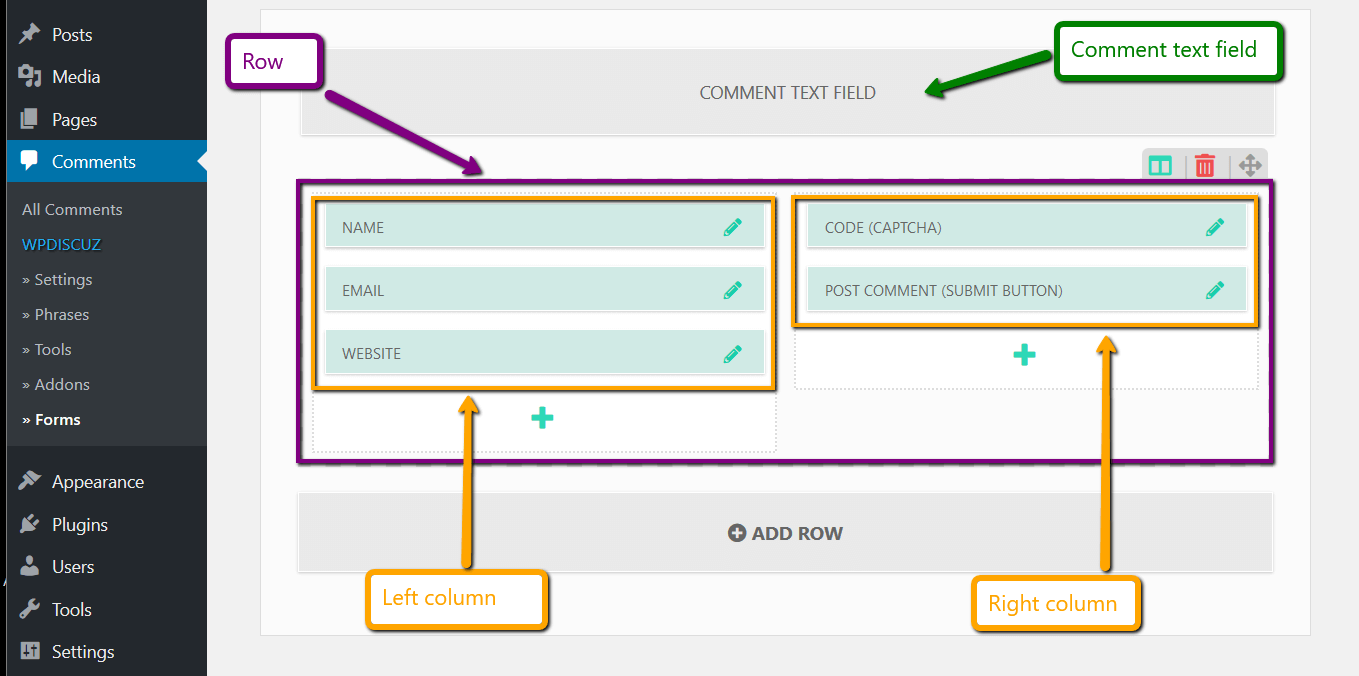
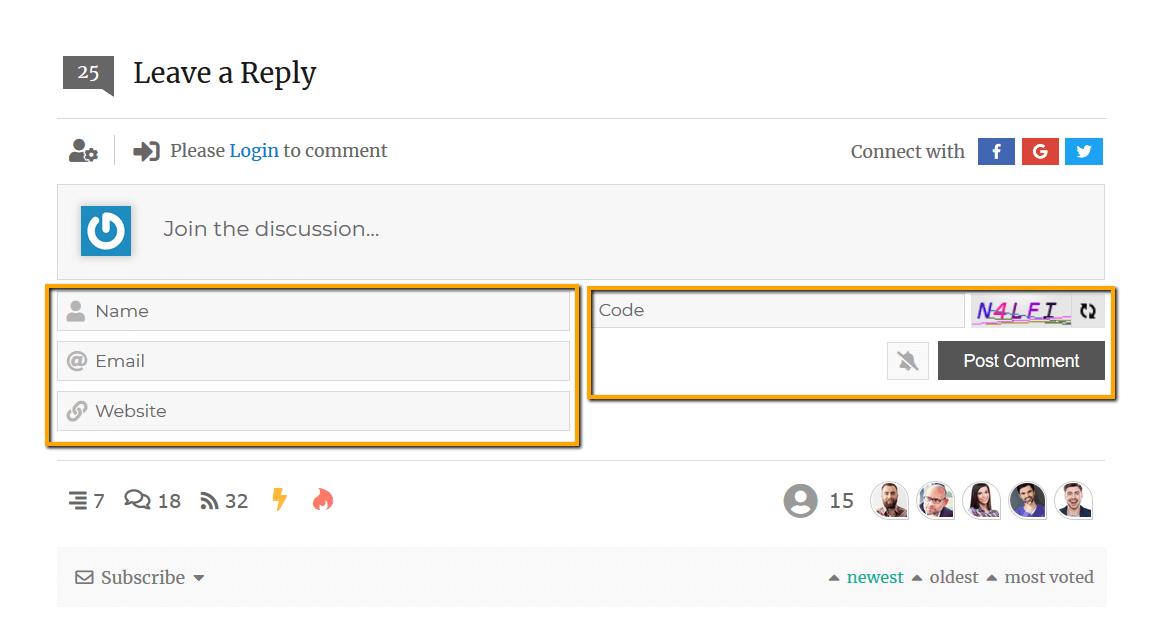
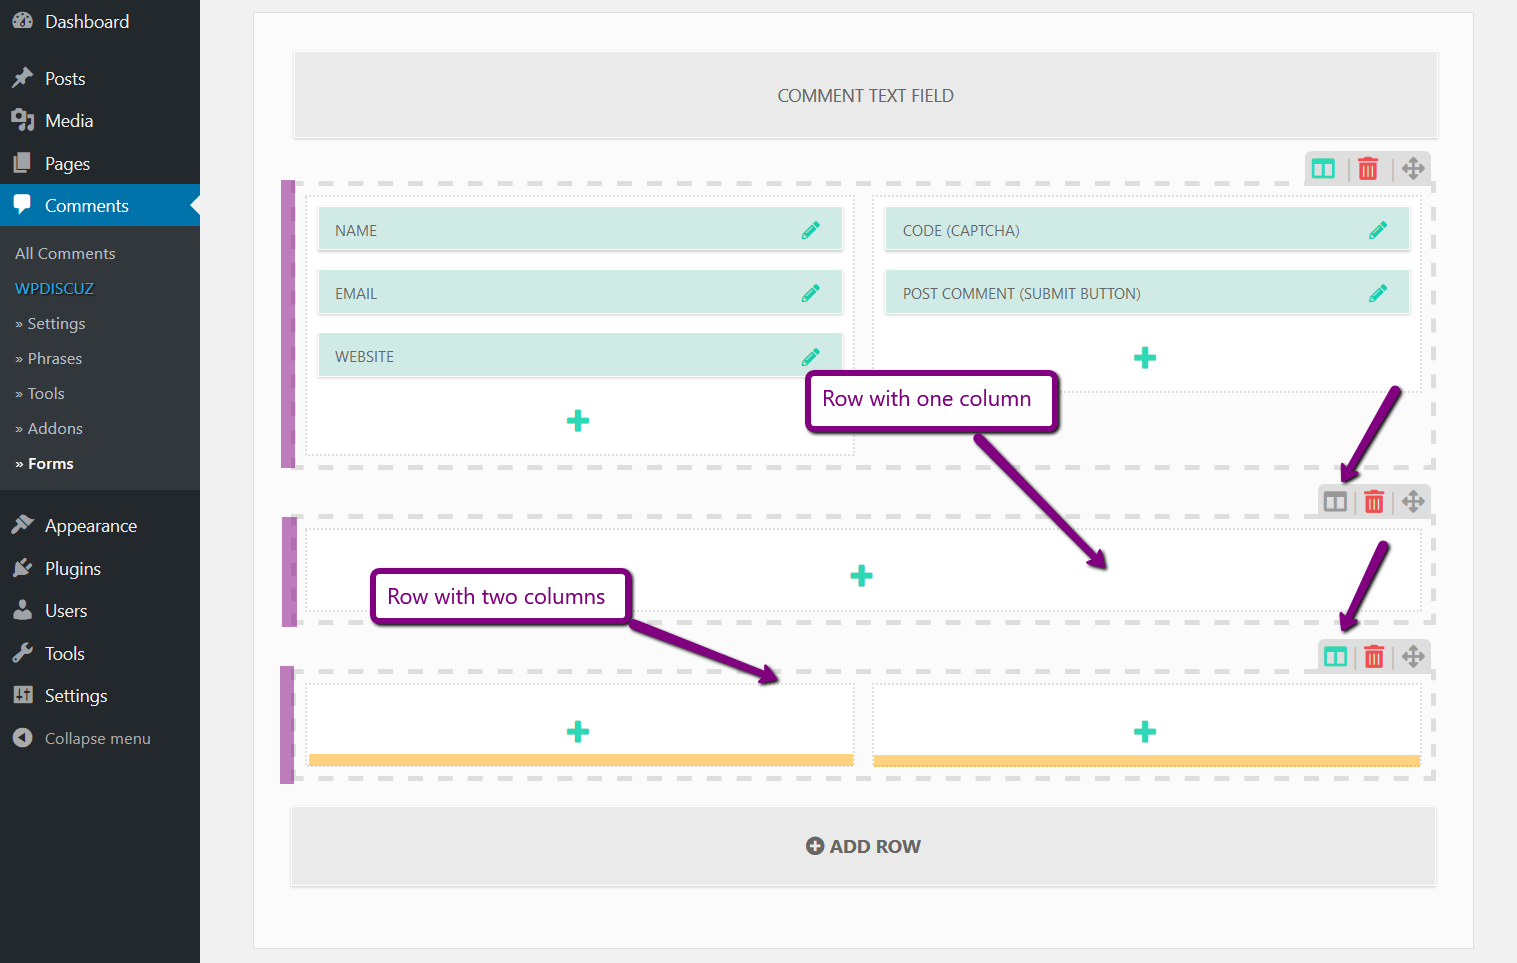
Using this tool you can change comment form layout (rows and cols). The Default Form consists of one rows and two cols. In the left column you can see three fields (Name, Email, Website) and in the right column two fields (CAPTCHA , Submit button).
Comment Form rows and cols
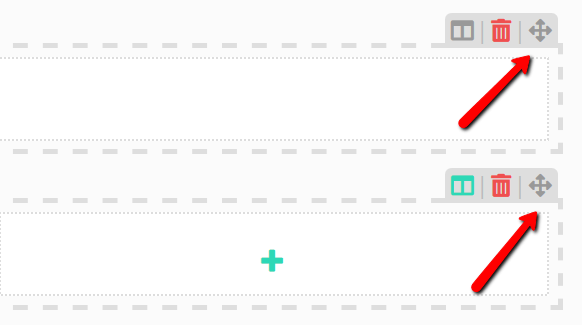
The comment text field is located on top of the form. Other fields are located in two columns below. You can drag and drop comment fields to change orders or move to other columns. Using the [Add Row] button you can add new rows to this form. All rows are also drag-able. By default new rows are created with one column. Using the “two cols” [ | ] button you can change it to two column. Using the delete button you can delete the row.
![“two cols” [ | ]](https://wpdiscuz.com/wp-content/uploads/2018/05/wpDiscuz-comment-form-builder-2-cols-toggle.png)
Comment Form Fields
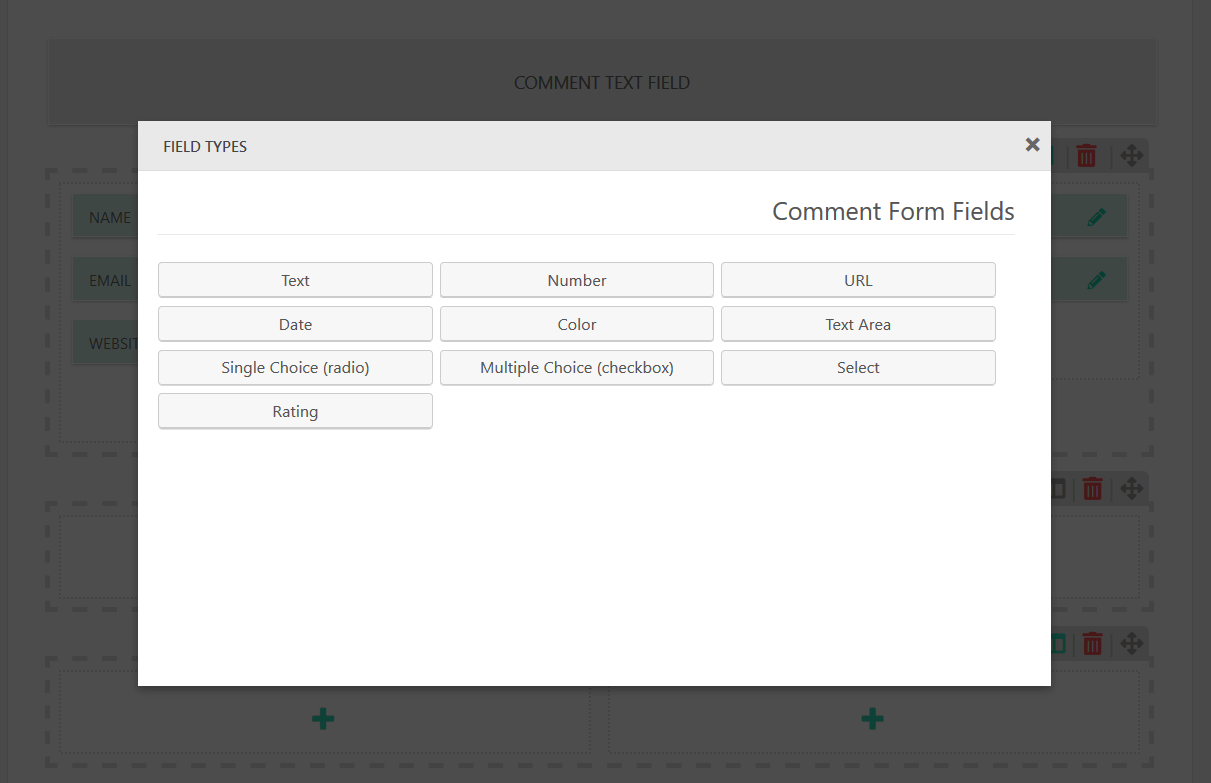
Once you finished with comment layout you can start adding custom comment fields. Click on [+] button, located on the bottom of each columns to start creating custom field. Then click on a preferred “field type” button on the pop-up window.
![[+]](https://wpdiscuz.com/wp-content/uploads/2018/05/wpDiscuz-comment-form-builder-add-custom-comment-field.png)
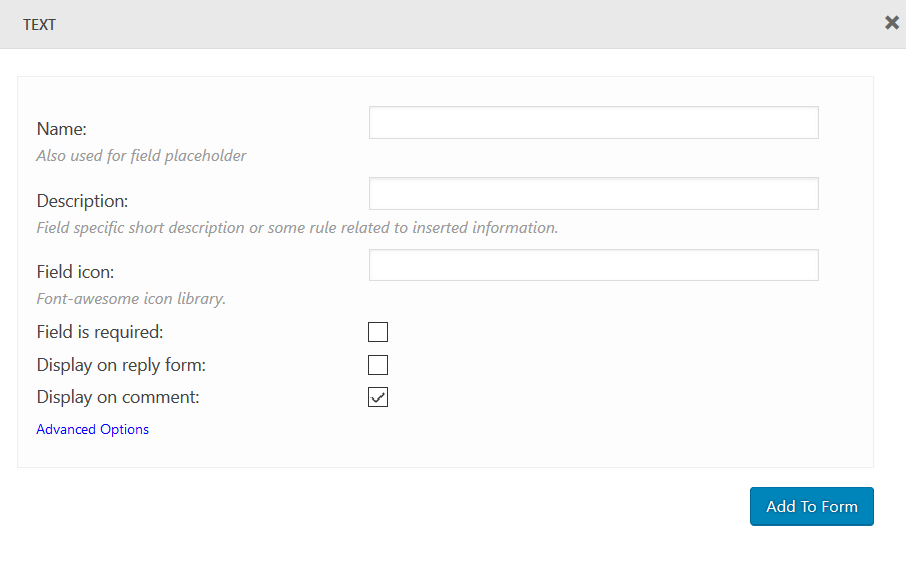
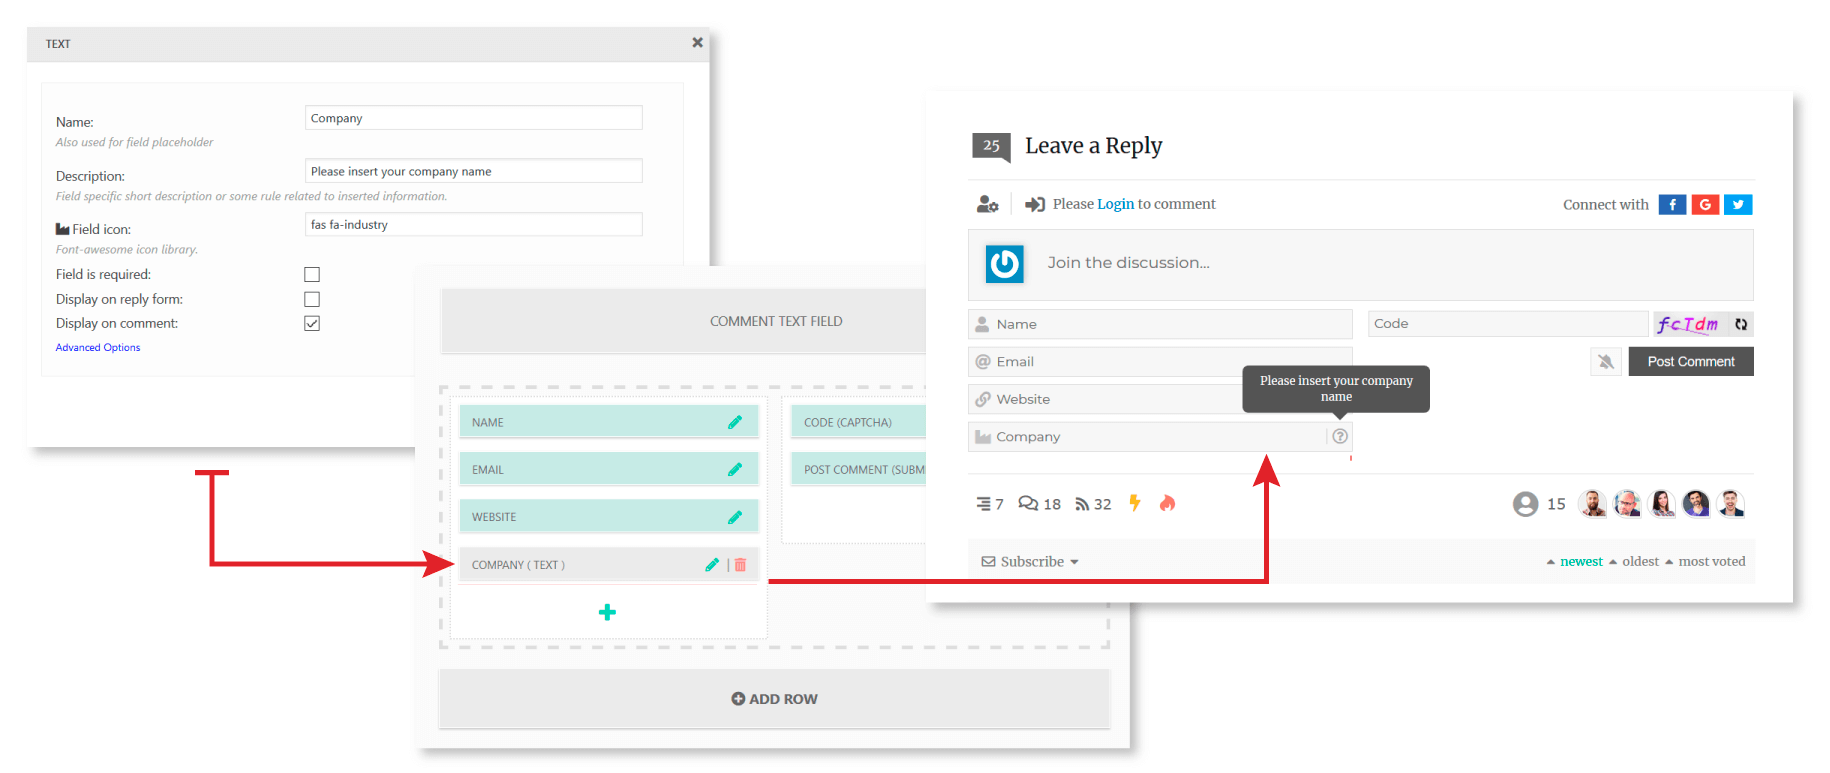
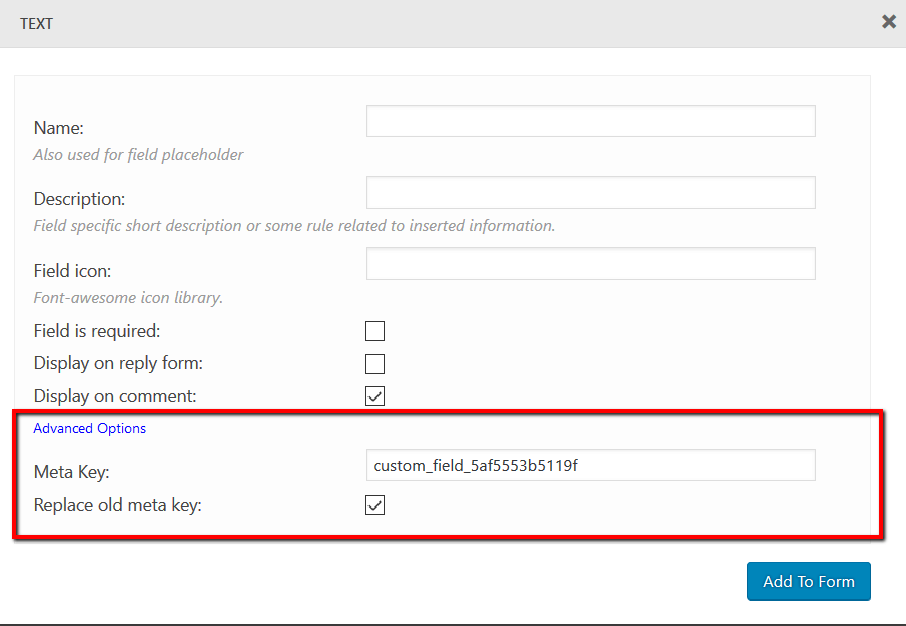
As an example we use “Text” field for creating a “Company” custom field. For the “Text” field type you should configure the following fields:
- Field Name: This is the field placeholder or label. it depends on the field type.
- Field Description: this is a field specific short description or some rule related to inserted information.If the Description field is filled, you’ll see (?) icon on the right side of this field. This icon displays the description text in a tooltip when user moves mouse over this icon.
- Field icon: Font Awesome icon class. You can find all icons here or search using the built-in icon picker.
- Field is required
- Display on reply form: You can choose whether display this custom field on reply form.
- Display on comment: You can choose whether display submitted data of this field on comment or not.
For developers, there are an advanced options to manage custom comment field key. This key is used to get submitted data and save in database.
Once all fields are configured, click on [Add to Form] button and put it in comment form. Drag and drop the field to your preferred location (row, col). We put it after all fields in the left column. Scroll up and click on [Update] button to save form settings.
![[Add to Form]](https://wpdiscuz.com/wp-content/uploads/2018/05/wpDiscuz-custom-comment-form-text-field-example_-save-form-button.png)
![[Update]](https://wpdiscuz.com/wp-content/uploads/2018/05/wpDiscuz-comment-form-builder-save-settings.png)
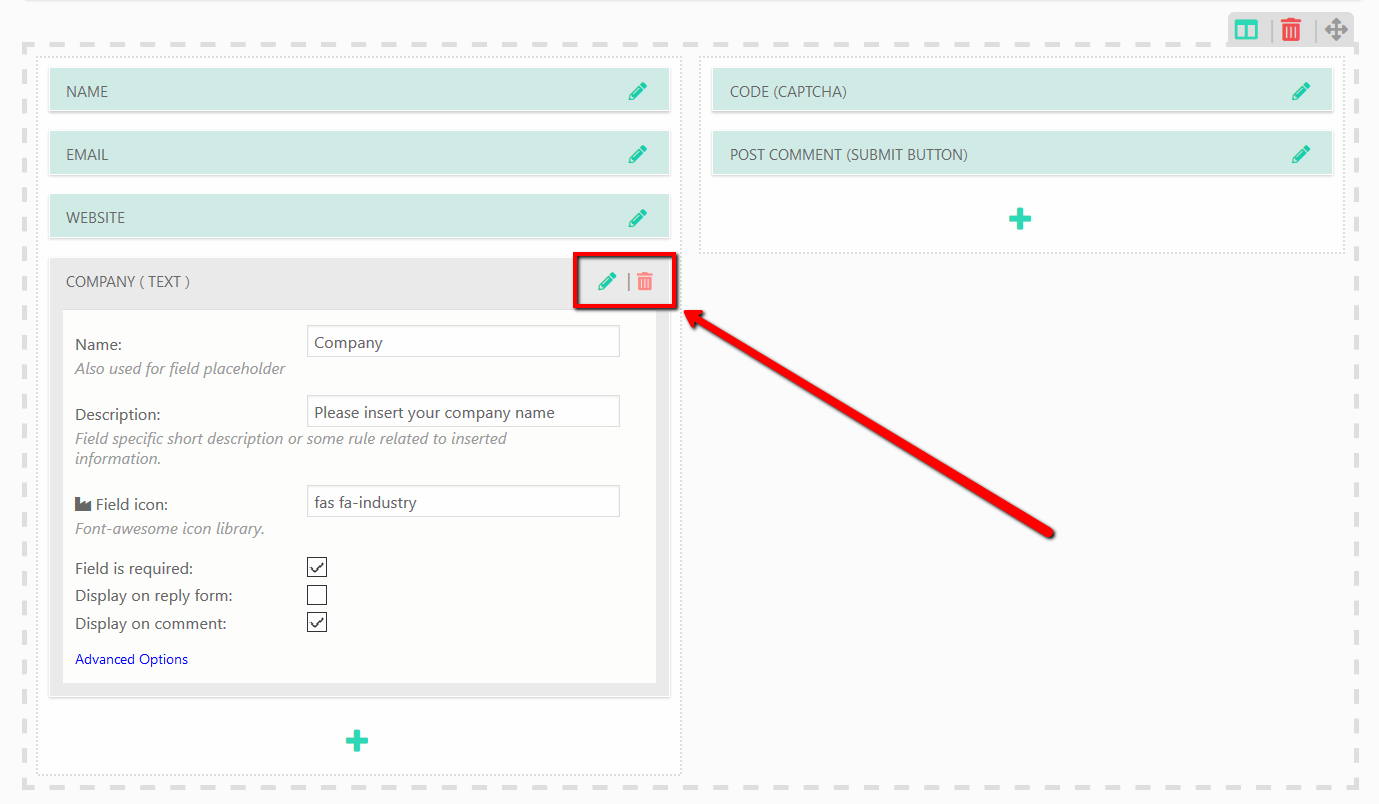
Edit and Delete fields
Click on the right green Pencil icon of each field to edit field settings. And use the red Basket icon to delete custom fields.
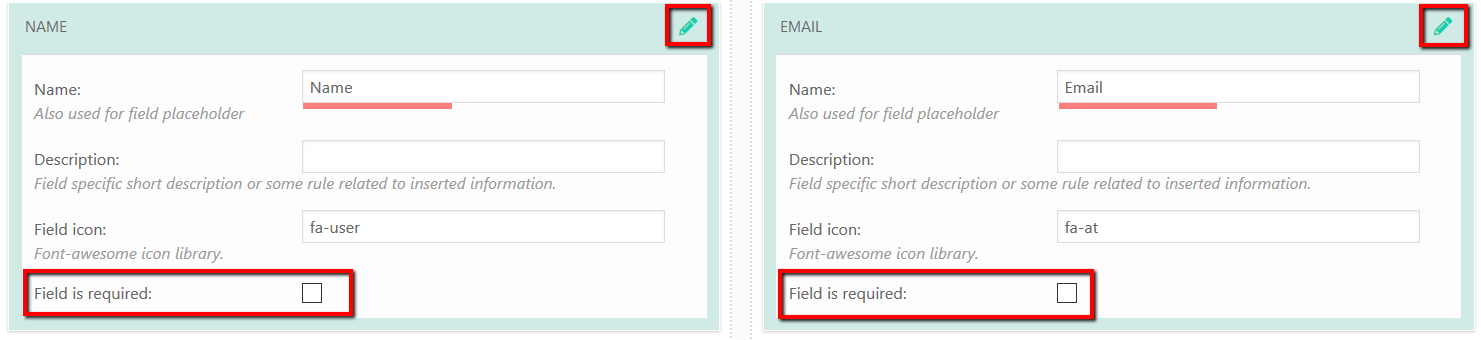
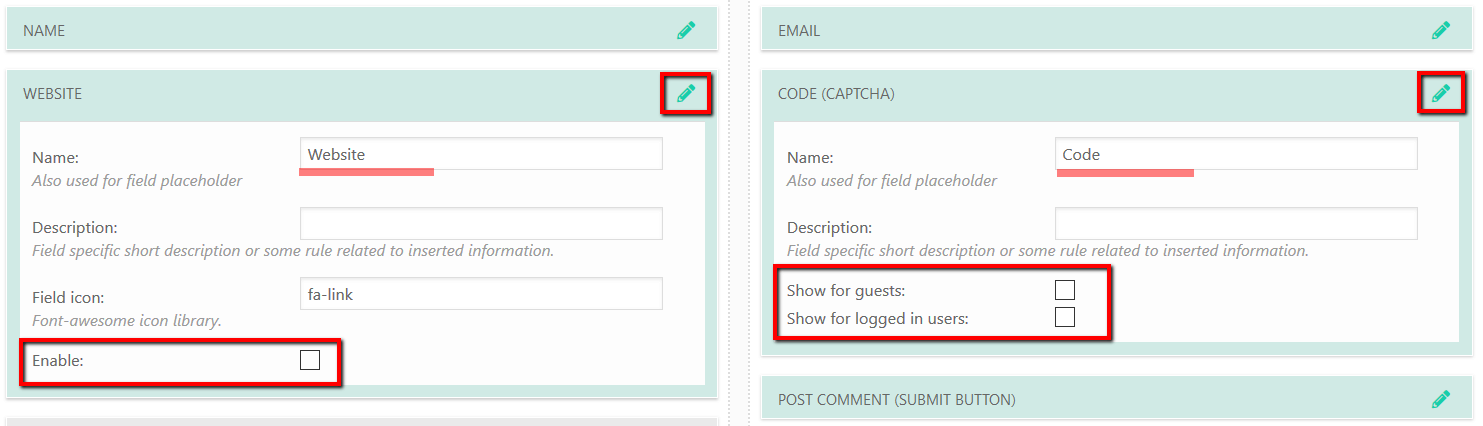
Tip: You cannot delete the default fields (name, email, website, captcha, submit). The Name and Email fields can be set not-required using according option. The Website and CAPTCHA field can be hidden by unchecking the “Enable” and “Show for guests” options accordingly.
Note: Custom fields “edit” and “delete” actions cannot be undone. All custom fields are stored in database based on custom field meta key set in custom field advanced settings. If you remove a custom field, it’ll also remove field data on website front-end comments. The only way to reverting back deleted fields is creating an identical custom field with the same custom field meta key.