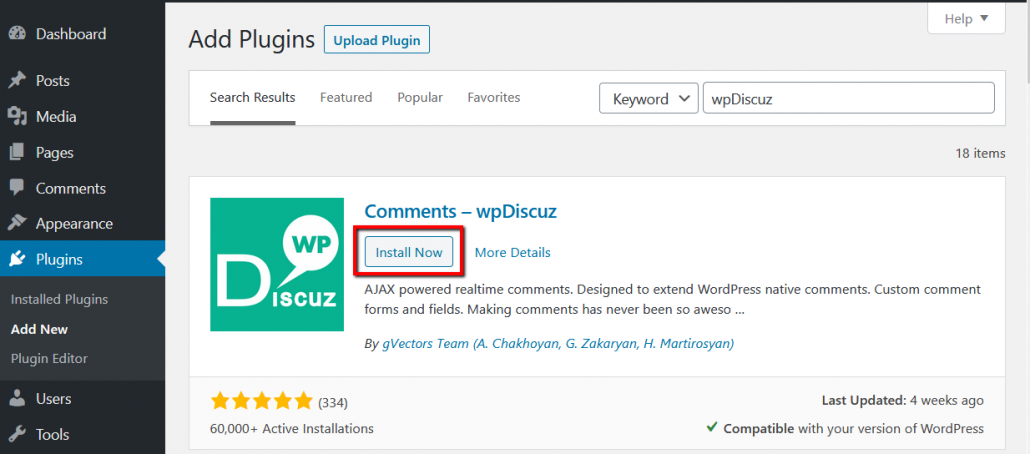
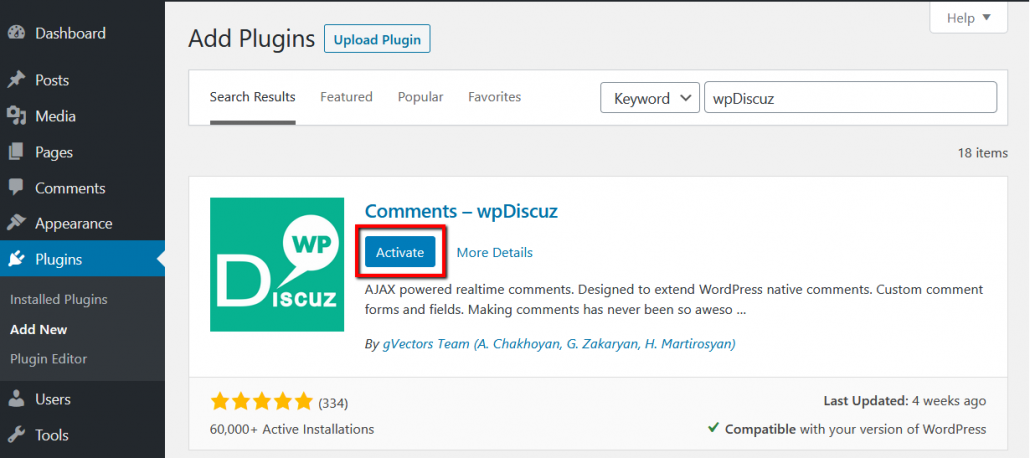
Navigate in Dashboard to Plugins admin page, click on [add new] button and search for wpDiscuz. Then click on [Install Now] button, wait for installation. Once it’s completed click on [Activate] button:
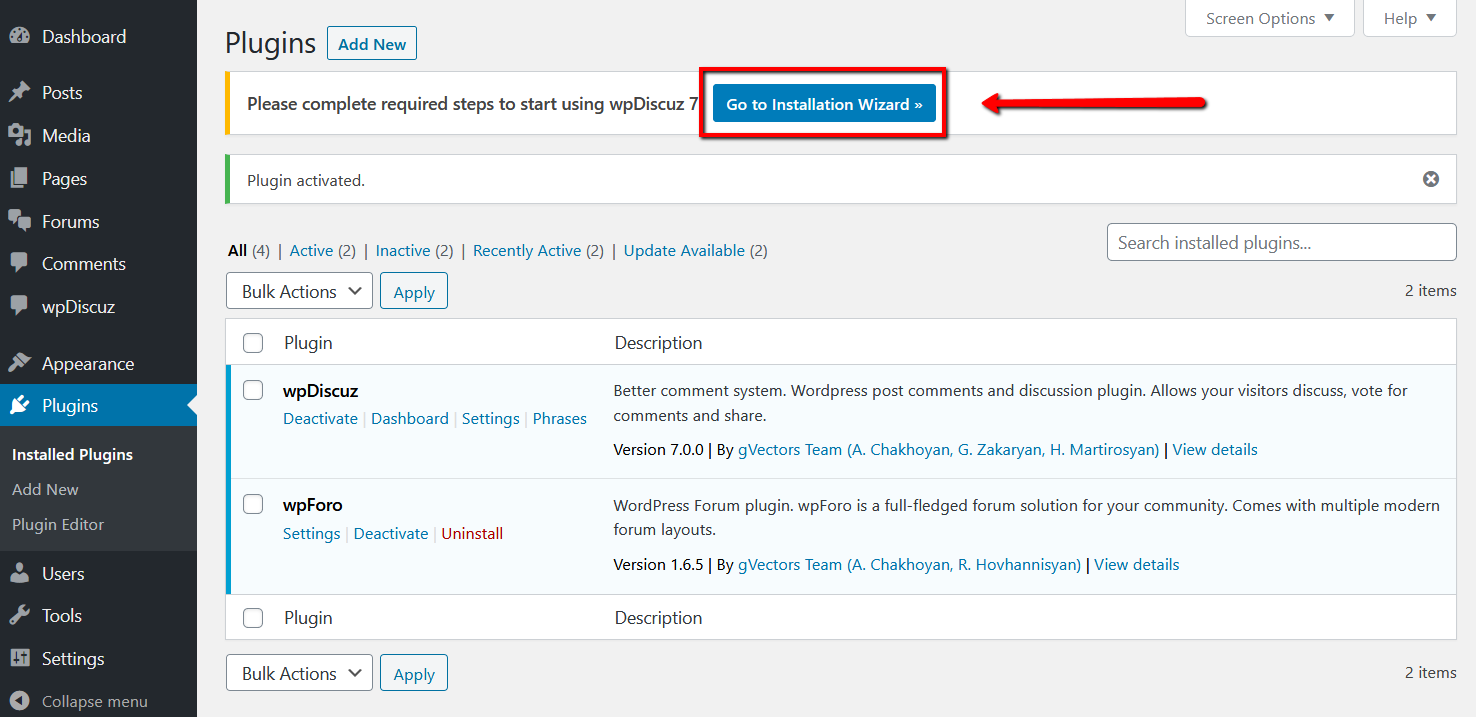
After installation and activation you’ll see wpDiscuz Installation Wizard button [Go to Installation Wizard »]. Please click to open installation Wizard. This is a three quick steps for setting a most important configurations before starting using wpDiscuz 7 plugin:
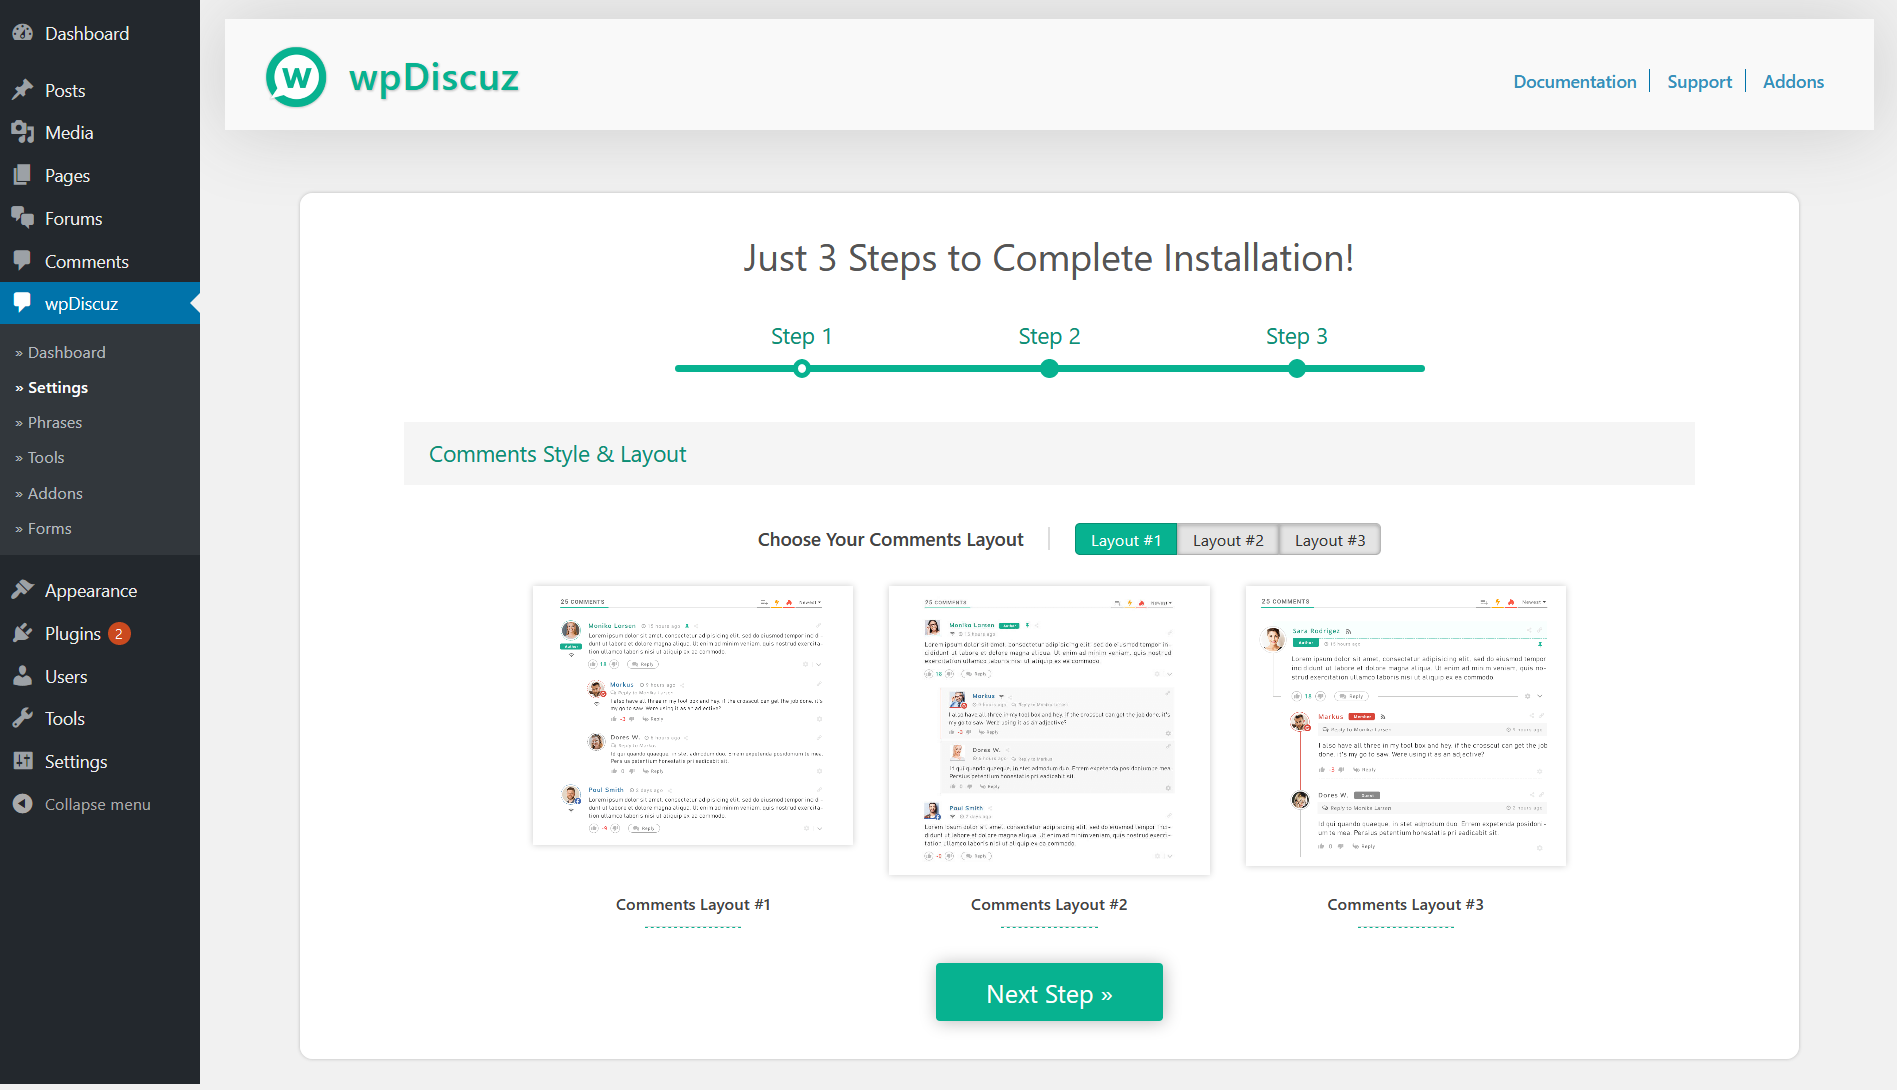
Installation Wizard Step 1 – Choose your preferred comment thread layout on the first step and click on [Next Step] button:
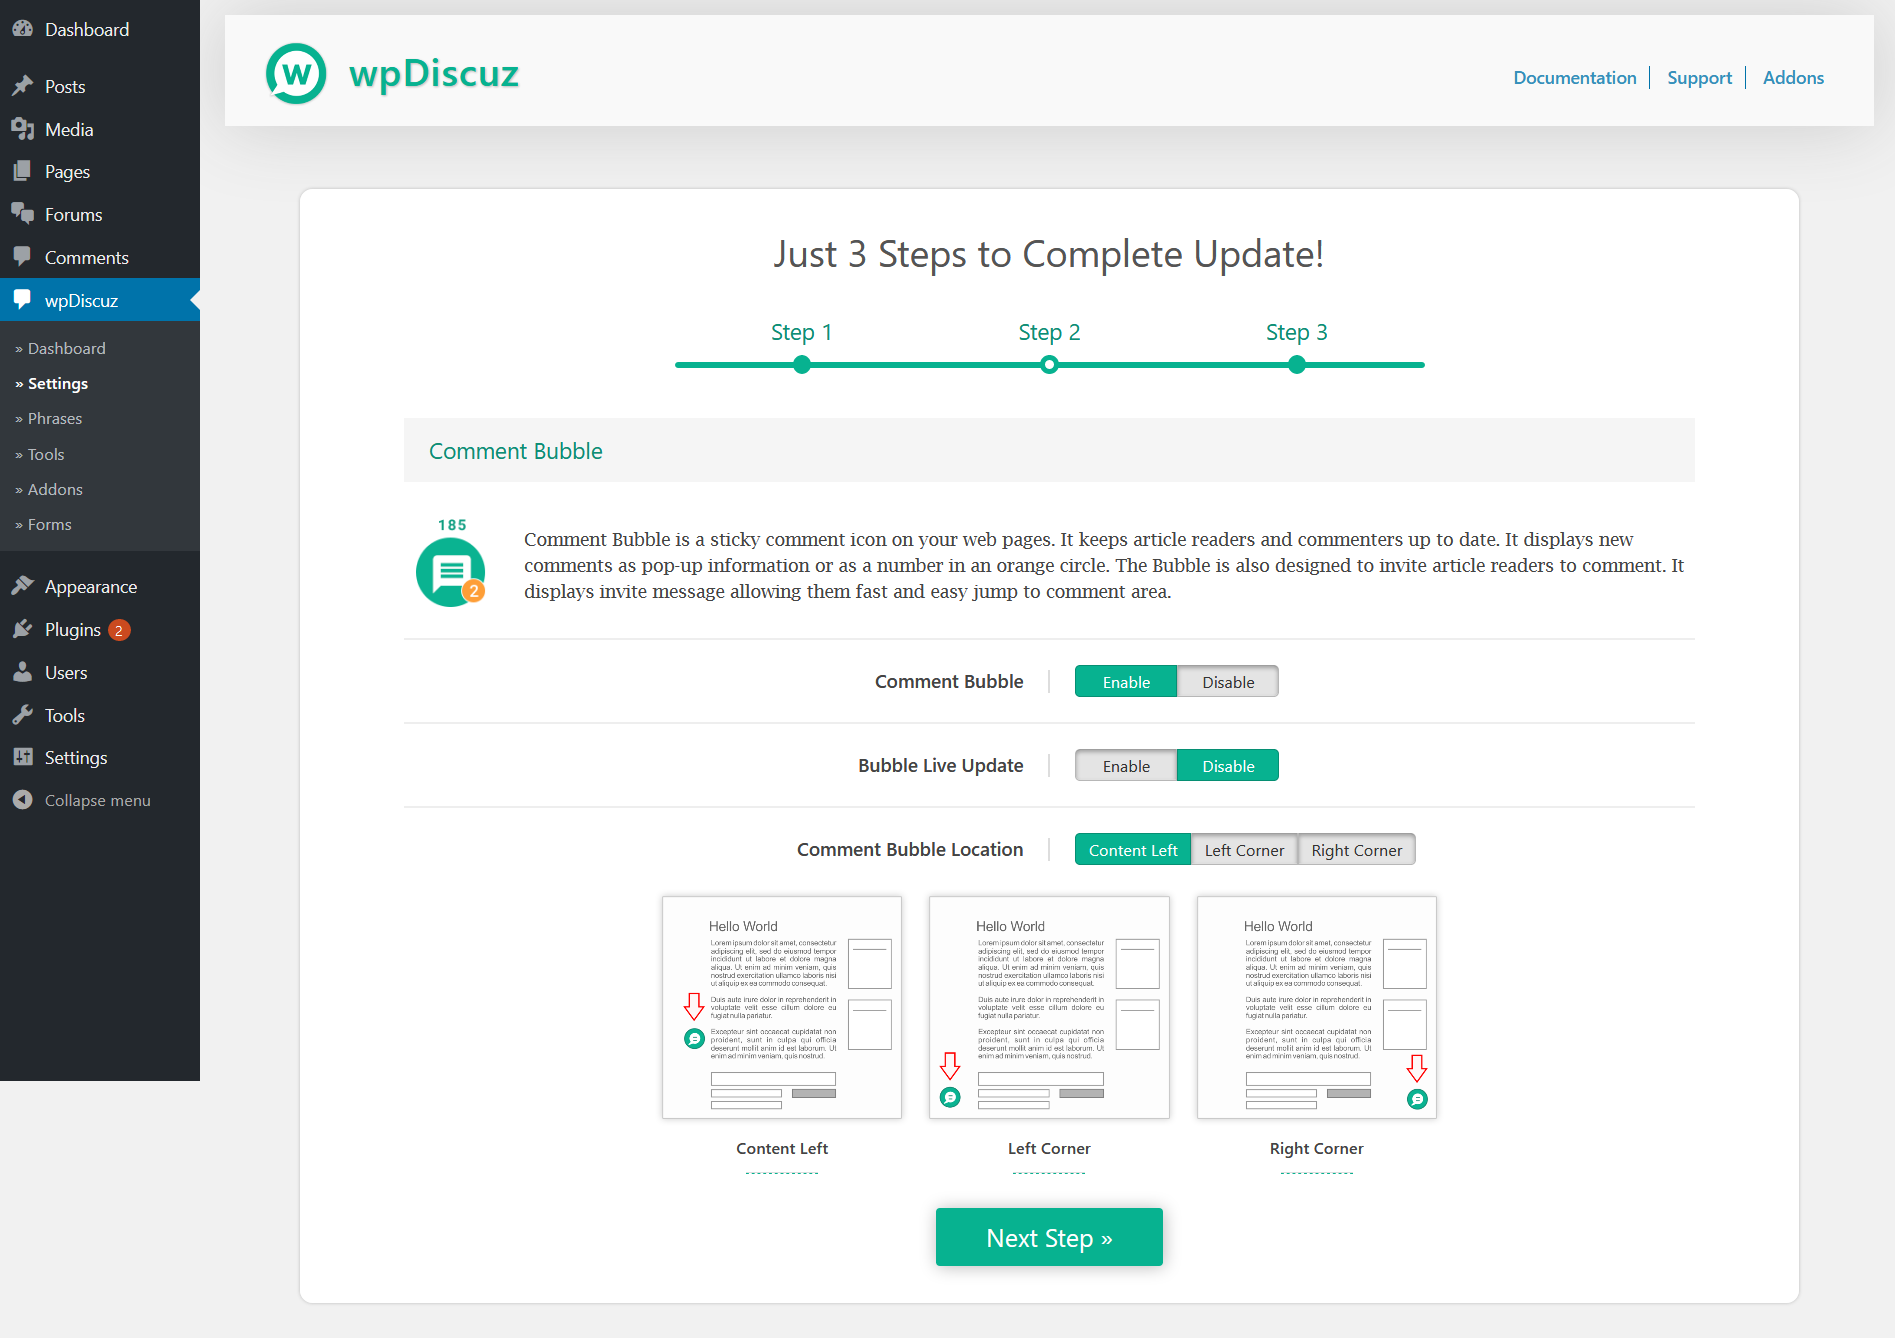
Installation Wizard Step 2 – Here you can manage Comment Bubble settings. You can enable it and set the displaying location, then click on the [Next Step] button:
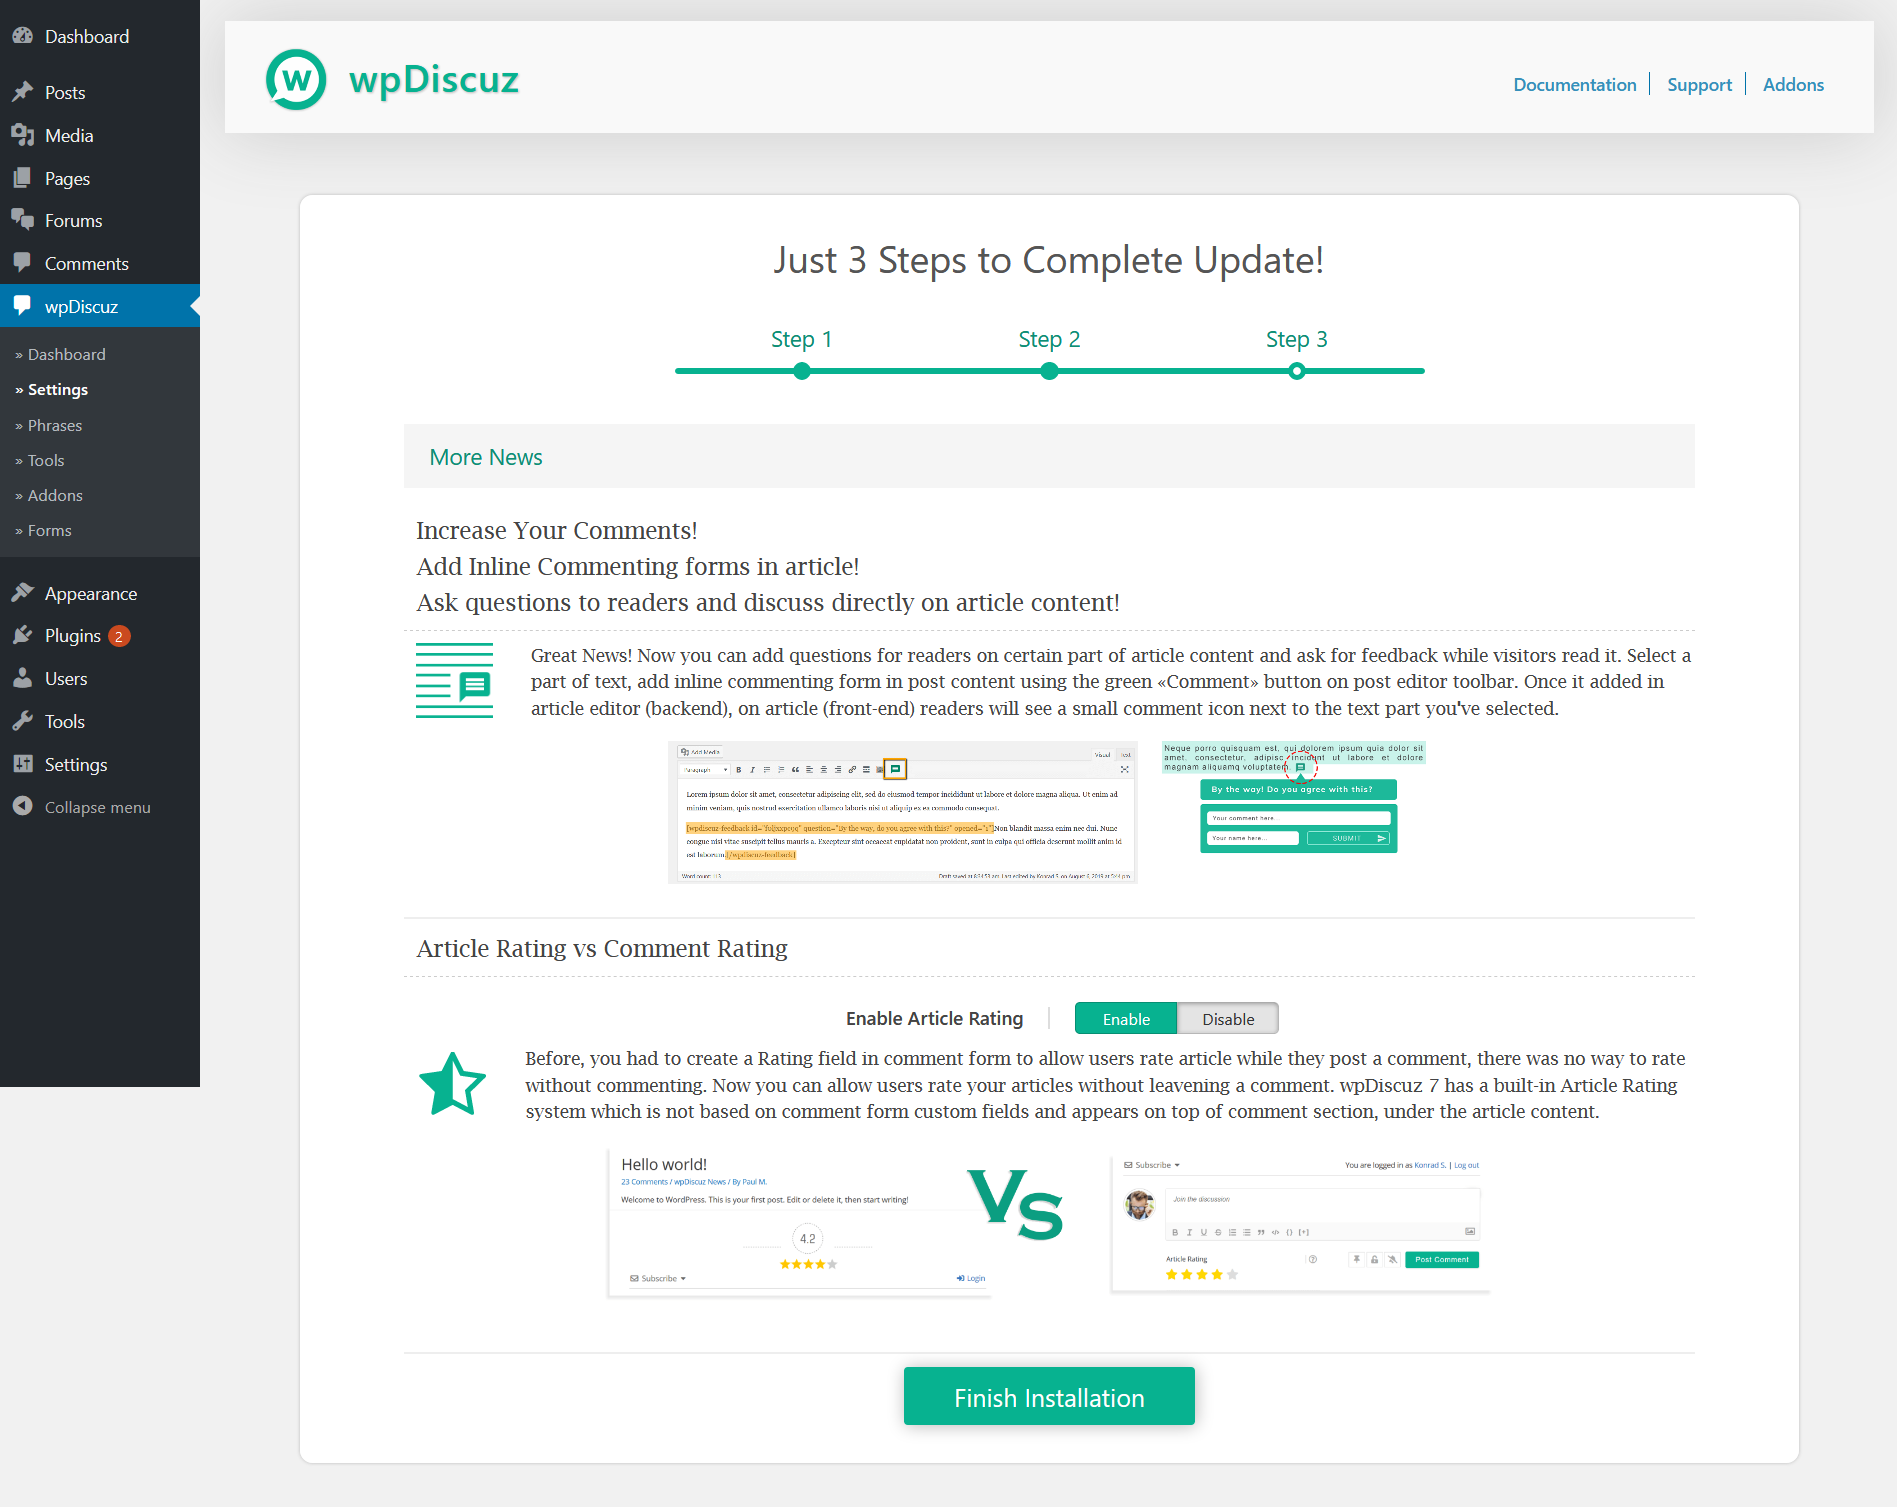
Installation Wizard Step 3 – In this step, the plugin introduces you new features, such as Inline Feedback and Post Rating. You can enable the Post Rating feature if you want and click on the [Finish Installation] button:
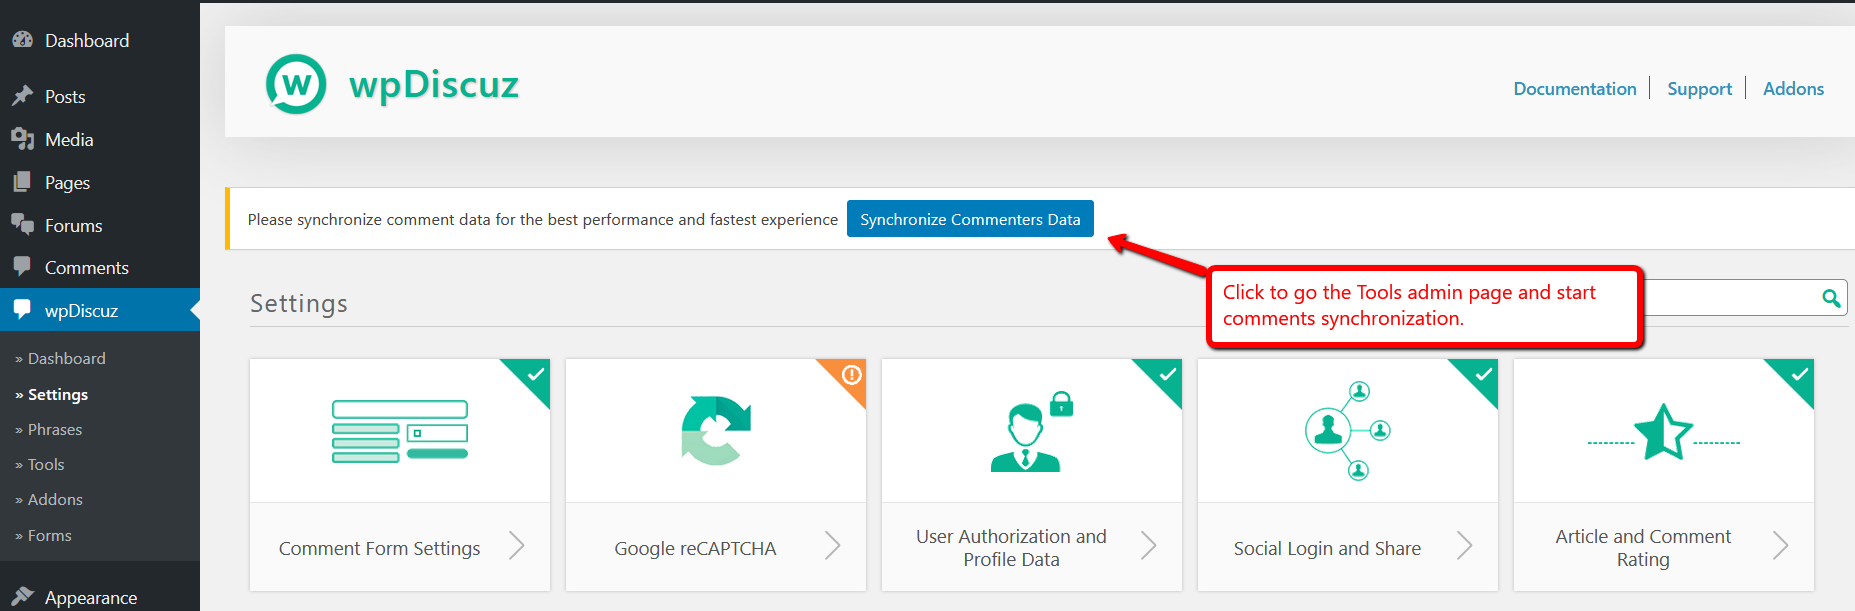
Once the installation wizard is finished, you’ll be redirected to Dashboard > wpDiscuz > Settings admin page. On the top of settings page you’ll see a button to start comment data optimization. This button synchronizes comment data and makes your comment system faster. Please click on the [Synchronize comment data] button, go to Tools admin page and start the data synchronization by clicking on according button on that admin page: